CLICK HERE FOR FREE BLOGGER TEMPLATES, LINK BUTTONS AND MORE! »
Showing posts with label 4th grade. Show all posts

Monday, August 25, 2014

Combo Boards!


I don't know about you, but I never seem to have enough display space in my classroom.  Never mind that I have five (!) bulletin boards. I want most of my display space to be for student work or instructional materials, but I realize it is important to have other displays like birthdays, job charts, and classroom management items.  That's why this year I came up with the idea of "combination" displays.  A combo board serves multiple functions in a small space.
The first example is my job chart/birthday board.  The pocket chart has has class jobs, which I call "leaders".  This goes with our school focus of the "Leader in Me".  Around the outside of the chart, I have a cupcake for each student with their birthday.  The cupcakes are in chronological order, so when a child has a birthday, I can just pull the cupcake off, pop it on a pencil, and give it as a gift.

 
     Another example of a combo board is my Super Improver Wall.  Using cards clipped to the pockets, I can add my Super Improver stars.  At the same time I can keep track of discipline by using the colored cards behind.  If students break a classroom rule, I move the cards.  The consequences for each color are above the display.


Friday, August 15, 2014

Goals for the New Year


Ready for laminating!

     One of the things I love about teaching is that each year we get to reinvent ourselves.  This is not like making a New Year's Resolution where everybody knows the old you.  We literally get to reinvent ourselves with a group of people who know nothing about the way we were before.  It's a remarkably exciting feeling, to say the least. 
     This year my personal/professional goals are linked closely to my class make-up.  Last year 40% of my class had documented special needs (IEPs or 504s).  This year it's 0%.  This means I will not be eligible for any support in my classroom.  Because I teach in a district with high needs, this has never happened to me before.  What an opportunity!
     However, it's not going to be a year I can just coast.  No one in my class may have documented special needs, but there are still students who are struggling.  Also, meeting with the third grade teachers, I kept hearing, "Bright, but no motivation."  over and over.
     So these are my classroom goals that I'm going to be blogging about for the coming school year:
1.  Pump Up the Learning Center
When I hear about kids that lack motivation, I instantly think learning games.  I have tons of learning games and have used a learning center with various degrees of effectiveness for many years.  Now it's time to really invest in making it work.  A full blog post on this is coming soon!
2.  Making Daily Five Even More Motivational
I love Daily Five, but every year I have a few kids who are not motivated by it.  In fact, sometimes the very fact that I don't assign work makes them think I've given them a license not to carefully read grade level material for comprehension.  I'm still keeping Daily Five, but I'm going to have students write a short summary after each book they read (instead of a weekly journal) and earn Book Bucks.  Each quarter I will have an auction where they can use their  Book Bucks to purchase items.
3.  WBT 2.0
Have you heard about Whole Brain Teaching?  Well, Coach B has reinvented it with his newest version that emphasizes critical thinking and writing.  I am pumped!
4.  Tweaking Differentiated/Common Core Aligned Everyday Math
Last year I had the high average group for Math and also did not have any support.  So I created a differentiated weekly plan that aligned the outdated EDM version we have with the Common Core.  (see this blog post)  It worked out very well and my students made excellent progress.  I need to use that plan again, because I have about five students coming in with NWEA scores at the end of fifth grade range.  I'm going to have to use some fifth grade materials and I'm not sure how well that will go over with the fifth grade team, but I'm still gonna try.

Monday, July 28, 2014

Adventures in Writing Part II: Step Up to Writing


     This spring my school piloted the SBAC assessment.  As fourth grade teachers, we were shocked at how much writing there was.  It's all computer based, and our students had very little experience writing long pieces totally on the computer in a single setting.  I'm really glad I started looking around for a great writing program the year before.
     About a year ago I wrote a post about my first adventures trying out Lucy Calkin's Units of Study. On the whole, my year went pretty well.  I certainly felt like my professional development needs were met.  It was nice to have such a highly detailed program and not have to worry as much about planning.   As I read through the lessons, it was like I was observing Lucy as a teacher.  This really fed my soul.
     However, as the year progressed, it was clear that my students did not have the prerequisites for the type of work the program expected of them.  The students that feed into my school as fourth graders come from a Reading First school.  This means that in K-3 they are required to have a minimum of 90 minutes of reading instruction that is not allowed to include writing.  Students who are struggling with reading have an additional 30-60 minutes of instruction outside the classroom, which also cannot include writing.  The students who are still in the classroom cannot do anything above and beyond, like writing, that these struggling students might miss, so even typical students cannot be writing during this 60 minutes.  After 90 minutes of Math, this leaves 30-45 minutes a day divided among Writing, Science, and Social Studies.  So you can imagine how little writing instruction students get before fourth grade. 
     Because of this lack of writing instruction (not just lack of following the entire Units of Study program), I felt that this program became too challenging for the students.  They did alright with the narrative and persuasive units, but things started to unravel with the report unit and by the time we reached the literary essay unit, I knew Lucy and I had to part ways.  It is a reluctant parting, but caused me to think about what I liked about the program and what its drawbacks were.  I certainly loved the high standard that the program aspired to. I love how it encouraged creativity.   I will definitely continue to use the "launching", narrative and persuasive units (the narrative with little alteration and the persuasive with considerable alteration).
     What I felt the program was lacking was concrete strategies for reluctant writers, particularly in the area of text organization.  Yes, there were a few and they were outstanding.  The students and I clung to those, like a droowning man clutches a life jacket.  I love her "boxes and bullets" ideas with persuasive writing.  The program also has some great "thinking starters".  These few were very impressive (I could actually SEE the light bulb go on for several students when I taught these strategies), but they were not enough to compensate for the many lessons where there were no such concrete strategies given and students were just expected to be able to come up with volumes of written words.   
     That's why this year I went looking for a program I could pair with Calkins' to give the students more structure and strategies.  Sometimes I think creativity in elementary student writing is over-rated.  I know Units of Study can elevate student writing in the direction of creativity. But the push for creativity is a waste of time for students with little or no writing experience or desire.  I'd rather their writing starts out as a bit formulaic at first.  They can add their own creativity after that, if they are motivated to do so.  So Units of Study will have to become my supplemental writing program. 
     The program I decided to be my primary writing instruction is Step Up to Writing, a program often used to complement Units of Study.  I wish I could say that I could afford the newest Common Core-aligned version, but after breaking the bank last summer buying Calkins with my own money, I knew I couldn't pull that again.  I was lucky enough to find the second edition on eBay for under $100.  It was just what I was looking for.
Home :: Workbooks / Resources :: Step Up to Writing 2e Classroom ...


     Step Up to Writing is a high visual and organized program for teaching writing.  The emphasis is on organization, particularly paragraph structure.  The paragraph is the "building block" of both short response writing and multi-paragraph writing.    Color-coded formulas and acronyms are used extensively in the program to emphasize paragraph organization.  I have the feeling I will be making a lot of anchor charts next year.  I also love that the program comes in a 3-ring binder.  This allowed me to rearrange units as I felt the need.     
     Stay tuned to see how things go next year.  It begins in about a month.

Cooperation VS Competition: Which Is Best?


Cooperative learning idea with two teams.
 
     Great teachers know how and when to use games in their classroom.  Games motivate students and are a great way to review material.  But which is better, cooperation of competition?
     Cooperative games build teamwork.  They are also a better way to eencourage striving students who often need a more nurturing and less stressful environment in order to perform well. The flip side is cooperative games are often not as motivating to bright students.  They can feel dragged down if other members of their team do not "pull their weight".  Struggling students can suffer, too, if more aggressive students act as bullies. 
     Competitive games are usually more rewarding for students, even if the winners of the game don't receive an actual prize.  When I do competitive games, usually the only prize is respect.  Bright students often thrive with competitive games, however struggling students can get very frustrated and shut down. 
     My solution is cooperative competitive games.  These are the types of games that students work cooperatively within a team, but that team competes with other teams.  Here are some of my favorite cooperative competitive games.
Show Me (A Kagan Structure)
     Materials:  1 whiteboard, marker, and eraser per group of 3, and any review materials
     Procedure: 
1.  Divide the class into groups of 3 and pass out materials.  If your class cannot be evenly divided into three, it's OK to have a group of 2.
2.  Have the students in each group decide who will be the Reader, Writer, and Shower.  Tell them that these jobs will rotate each round, so every person in the group will have a chance to be every job.  In the group of 2 the Reader and Shower will be the same person.
3.  Using your review materials, have the Reader read the problem or question.  The group then decides on the answer and the Writer writes it on the whiteboard.  The Shower goes up to the front of the room and holds up the whiteooard so the class cannot see it.
4.  When all of the groups have a Shower in front of the room, the teacher says, "One, two, three, show me!" and all the Showers turn their whiteboards around.  The teacher gives one point for each group with the correct answer. 
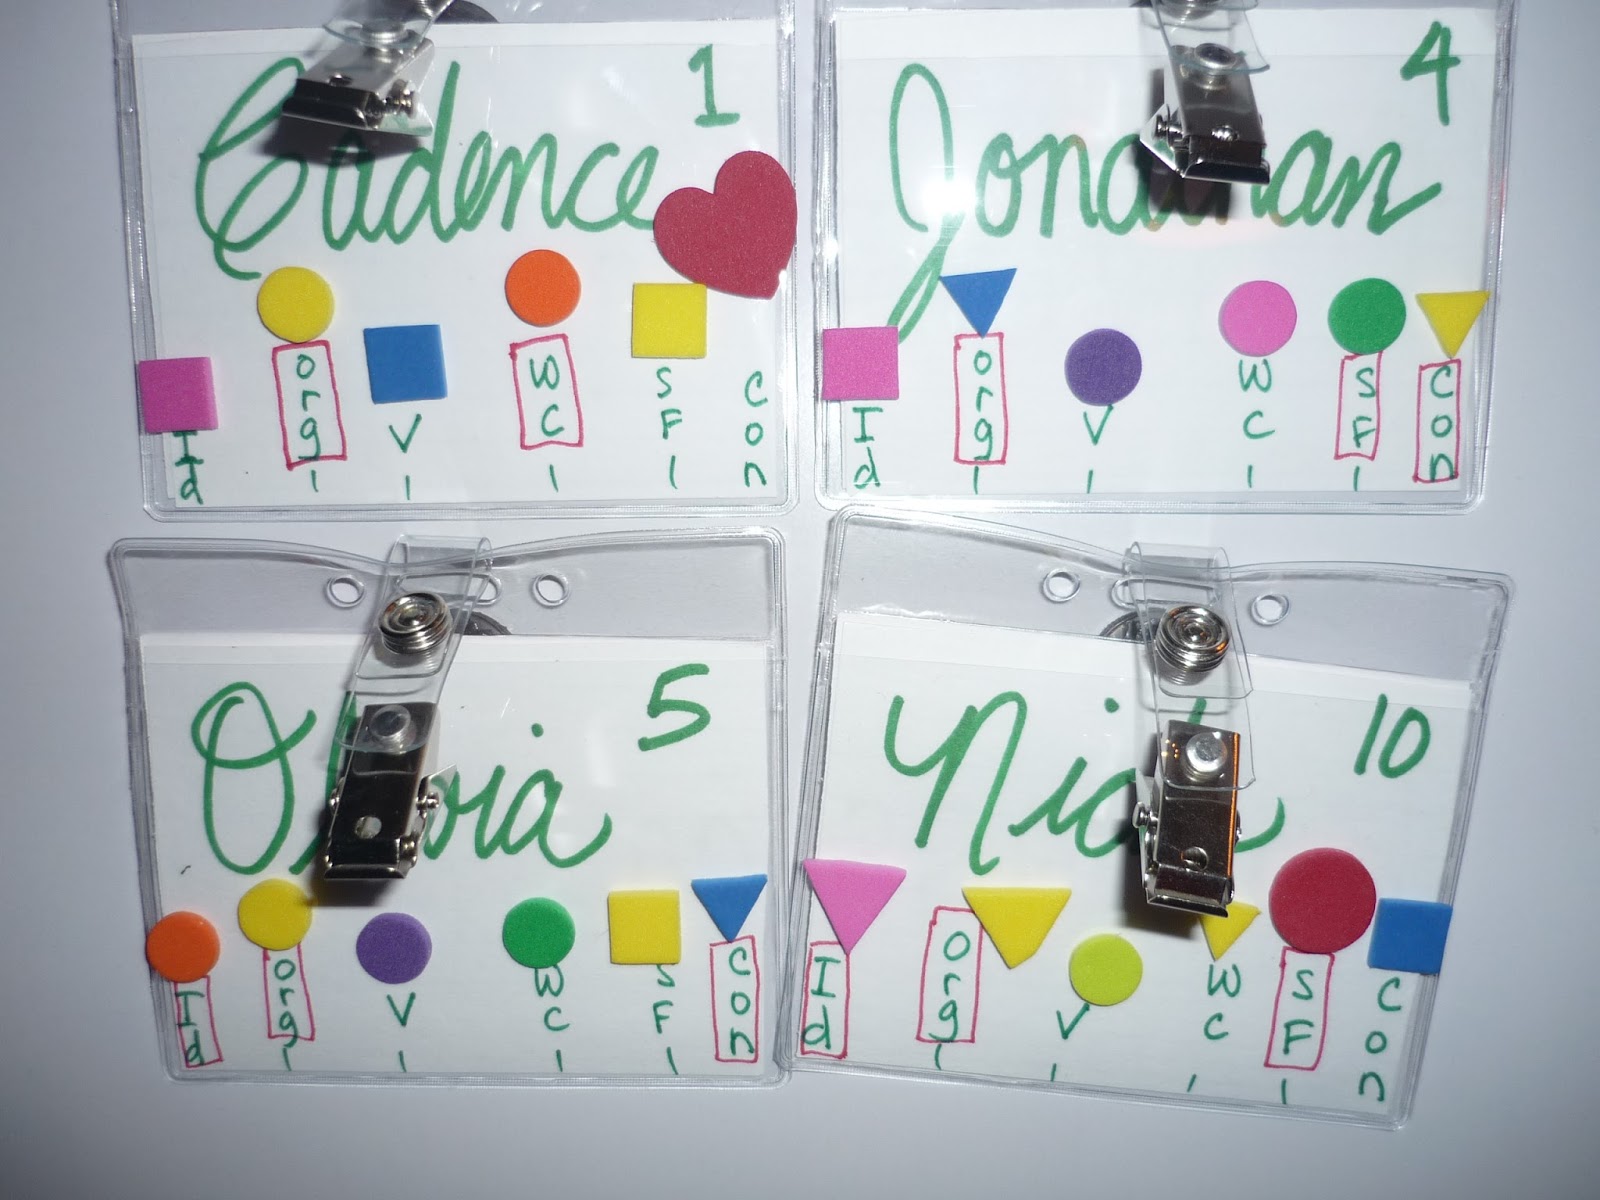
CC Toss (pictured above)
     Materials:  6-12 numbered buckets/containers, a tennis ball or beanbag, review materials
     Procedure:
1.  CC Toss stands for Cooperative Competitive Toss.  Divide the class into two groups and line them up facing the buckets you have previously set up. 
2.  Pose a question/problem to the first two people in line.  Kids yell out the answer as soon as they have it.  The trick is to not tell if the person is right or wrong.  The second student has as long as they like to decide if they are right or wrong.  It is up to you if you want kids to be able to consult their teammates on this one.  If the first person is right and the second person correctly says they were, both kids get to toss the ball and you record the points.  If the first student is wrong and the second student knows this, the second team gets to toss the ball but not the first.  If the first team is right, but the second team thinks they are wrong, only the first team gets to toss the ball. 
Auctions and Non-Auctions
     Materials:  objects to auction off, a way to keep track of points (coupons, play money, charts, etc.), a chart
     Procedure:
1.  Traditional auctions are a competitive way to reward students.  The teacher gives play money or points and the children use these to purchase items at auction. 
2.  I also have non-auctions.  Before a non-auction, I will give kids a list of reinforcers and have them rank them from high to low.  Usually the reinforcers have a theme, like inside activities, outside activities, candy, or ice cream and toppings.  Using this information, I make up a chart that assigns values to these items.  The items or activities that the students ranked the highest will be the most expensive.  In a non-auction, anyone with the required number of points/tickets/coupons gets what they want.  So if everyone has enough money for a banana split, they all get a banana split.
 
     What are your favorite competitive and cooperative games?  Please share!
 

Saturday, February 8, 2014

TEERs of Teacher Joy!

Last year, in fifth grade, I piloted the TEER strategy for answering short answer questions in response to literature.  TEER is an acronym to help students remember the four parts their answer needs to have.  Those parts are:
  • TTQA (Turn the question around)
  • Evidence (right from the book, including page number and quotation marks if not paraphrasing)
  • Explanation (Why did you choose this as the most compelling evidence?)
  • Restatement
With students a year younger in fourth grade, I found they needed a lot more structure.  Specifically they needed the actual words to use to signal both the evidence section and the explanation sections.  So I created a scaffolded form that helps students with language impairments create fantastic open response answers.  The words the students need are right next to the appropriate section, so students can easily access them. Why didn't I have them pre-printed so all they had to do is fill in the blank?  My mother, a sped Teacher of the Year, always taught me:

"Have students write what you want them to most remember." 


There certainly is a time and place for creativity in open response.  But when students are first learning the "nuts and bolts" of this specialized type of writing, they should not be creative.  Once they have learned the structure of open response, they can apply their own brand of creativity.

Thursday, January 2, 2014

Writing "Retirement" Board

I have four small bulletin boards in my room.  They are a challenge to plan for.  They are not big enough to display student work, so I struggle sometimes to keep them current and relevant for my students.
This year, in implementing Lucy Calkins' Units of Study, I needed to have an area in the front of the classroom to store visuals related to that program.  I call this bulletin board my "Writer's Block".  By the end of the first quarter it is pretty full with anchor charts, "Take to Your Seat" writing ideas (for  kids that couldn't come up with something to write about), other visuals and graphic organizers.

So what to do with all that stuff at the end of the quarter?  Lucy herself expressed it best.  We need to impress upon our students that they must remember everything they have learned previously when they embark on a new project in Writing.  So, in the back of the room, I created a Writing "Retirement" board.  This is where I put the most important evidence of learning from previous quarters.  Not everything goes on the retirement wall, otherwise it would be too full.  Using the bulletin board at the back of the room makes it easy for me to see and reference for my students. 

Towards the end of the second quarter, I have moved all the six traits describers to the Retirement board.  I have also moved the four levels chart.  I have two posters I made from the first quarter: a quote from Lucy and Show Don't Tell.  I replaced the "Ideas" descriptor from my rubric because the strategy of "show don't tell"  is the best method to add ideas to writing. 
This quarter we have been studying opinion writing, including the strong organizational components of a strong thesis statement, reasons, evidence, and conclusion.  I will probably take down the organizational poster and replace it with the graphic organizer we have been using during this unit.
How do help students remember the important things you have taught without having too much "eye clutter" for your students?

Friday, November 15, 2013

Guided Reading and The Common Core State Standards


      Many teachers have asked if guided reading still has a place with the Common Core State Standards.  Guided reading is an instructional technique in which teachers load much of their instruction up front. They often preview challenging words to decode and vocabulary words that may be unfamiliar.  Often teachers also give students background about a topic covered by the text that may be unfamiliar to the age and background of our students.
     The Common Core State Standards (CCSS) in general de-emphasizes pre-reading strategies in favor of students digging deeply into texts and figuring out challenging words and ideas by "wrestling" with the text itself.  This instructional technique is called close reading.


     So, back to my original question.  Does traditional guided reading still have a place in our classrooms today?  It is my belief that overusing a guided reading approach does not encourage students to use any strategies when they are reading for pleasure or during an assessment.  However, there is still a need in our classrooms to use some guided reading techniques.
     This year I have a small group of students that really struggle with comprehension and fluency.  They don't like reading and are not able to find or stick with good fit books.  Their Daily 5 reading is totally deviod of thinking or strategizing.  Despite my repeated attempts and teaching, they view reading as a passive process, often called "word calling" in the research on literacy instruction.  We're now in the second quarter. This just can't continue.  So... time to dust off guided reading, which is towards the bottom of my "bag o' tricks". 
     In my version of guided reading, I will still preview a few individual words, but I will also heavily use context clues to help the students discover for themselves what the words mean.  Then students will read the text once through, looking for the "main idea".  I am using a biography of Vasco da Gama which links in to our Social Studies unit on Explorers.  This picture book has some pretty hefty vocabulary.  The first time the students read the books, the task they will have to accomplish is to figure out where would be a good place to end the chapter, if the book was a chapter book.  Then they have to give the title a chapter and justify their choice.  They'll be marking the book with post-its, so if they need to revise their ideas they can.

Saturday, October 26, 2013

Exploring the Role of Rounding and Estimating in Subtraction

All Things upper Elementary, a blog that I follow regularly recently had a post about teaching students to really develop problem-solving skills, rather than just learn rote algorithms.  See her fantastic post here.  This post really resonated with me as we are in the final days of our unit on subtraction.  Most of the kids can use the algorithm successfully to subtract multi-digit numbers.  Some cannot.  But even those that can use the algorithm don't really understand what they are doing.  To quote the ATUE:

"A written algorithm is meant to SHOW you have to think, NOT teach you how to think."
 
I realized that I needed to teach more thinking and less algorithm.  So today's freebie lesson plan is designed to focus students on using rounding and estimation to help them with subtraction.
 
Materials:  personal whiteboards, marker, and eraser for each child, the same for the teacher. 
Duration:  About 30 minutes (can be made longer or shorter)          Grade Level:     3-5
 
1.  Warm-Up:  Pose some subtraction problems using multiples of ten.  Start with problems like 90-70 = ? and end with problems like 8,000 - 5,000.
2.  Write your final problem in the warm up on the board (let's say it's 8,000 - 5,000).  Pose a related problem, leaving the first number the same, such as 8,000 - 4,875.  Have the students estimate a solution and show their answer.  If more than a few students get the answer wrong (it should still be 5,000), demonstrate how 4,875 rounds up to 5,000.  So the answer will be about the same as the original problem.  You can't just use the front of the number to estimate the answer.  You need to look at the whole number.
Do several more examples, coaching after each one as needed.  Once most of the class can successfully estimate the difference for each problem you pose, ask them to not end their estimates in zero. Pose problems in a sequence like this:
12,000 - 8,000 = (4,000)          12,000 - 7, 679 = (4,000)          12,000 - 7, 679 = (4,335)
Ask students to tell how they decided if the difference was more or less than their estimate.  If students do not come up with a method, show them how when the subtrahend is less than the estimate, the difference will be larger.  Pose several problems using this method. 
 
By using a lesson progression like this, you can help students think beyond the algorithm.  Enjoy!


Wednesday, October 16, 2013

Adventures in Lucy Calkins' Units of Study

This summer my major purchase for personal professional development was Lucy Calkins' Units of Study in Writing.  I spent a delightful summer with Lucy.  Reading her book was like having a conversation with a great mentor teacher.  Many people comment that her ten-plus page lesson plans are a nightmare to get through.  I would agree with that, but just because the lesson plans are this long doesn't mean you have to do all of it.  I would much rather have much more than I need than have to make up my own stuff.  Most of my lessons to my students end up being "distilled essence of Lucy" rather than a verbatim recitation of her lessons. 
Today's lesson was definitely one of those essence ones.  The lesson was about making characters come alive by describing both their internal and external traits.  To liven things up a bit, I introduced my students to one of my favorite music videos on You Tube:  Julian Smith's Reading a Book.  In it, the singer acts all tough and mean when people interrupt him while reading.  His tough exterior is totally at odds with his zest for reading.   The kids got the juxtaposition between internal and external traits immediately. It was a fun introduction to the lesson and I saw several students who tried the technique, including one of my most reluctant writers.

One of the biggest frustrations I have teaching Writing is that students seem to so very rarely take the advice we given them in our lessons.  It's absolutely unheard of in a Math class for students not to follow the algorithm the teacher provides, yet in Writing "doing your own thing" is rampant.  Today I tried to combat that by, at the end of Writing, having each child get out a highlighter.  They traded daybooks with a partner and highlighted evidence of today's lesson on character traits (if they could find it).  Overall the class was very honest in their highlighting and this gave me a quick way to judge what students could still use some help in this area.

Sunday, October 6, 2013

Rounding Strategies: 3NBT1, 4NBT3, 5NBT4

     After a rough start, my leveled Math class is going smoothly at last.  My students have gotten into a routine of a whole-class lesson on Monday (with pre-test), differentiated instruction based on the pre-test on Tuesday, Wednesday, and Thursday, finishing with another whole-class lesson on Friday with a final, standards-based quiz on that day.  Most students are seeing growth as they graph their pre- and post-assessments.  With this leveled group, I have often found that the class doesn't usually fall into three groups, like I have seen with heterogeneous groups in the past.  Quite often, they only fall into two groups.  This has lead to some changes in my I Love Math groups.  Most of the time, I divide the class into two groups.  One works with me while the other works on their Ten Marks or Manga High assignments on the computer.  Then the switch.  When there is a preponderance of students who have mastered the pre-test, I will often include Wednesday as an additional whole-class lesson. 
     This past week we worked on rounding.  Rounding was one of those skills that no one in the class was even close to mastering, even after the first whole-class lesson.  I had to dig deeper in order to meet my students' needs.
     The first resources I used was Learn Zillion.  Using the Quick Code LZ525 you can see a great lesson that uses a number line to show how to round.  We used the following template:

original number:_____________________
 
 
____________________________________________________________________________________
 
 
__________                                                   __________                                                    __________
low benchmark                                                 midpoint                                                 high benchmark
 
     For each  number, they created an individual number line and place the original number as a dot on that number line.  This was a time consuming process, but after doing several together, the light bulb went on for many struggling students who could finally SEE what it means to round.
     After a differentiation day where I reinforced this method, I taught method number 2.  This I introduced as a "game" I called "Slap! Trap!".  I passed out a place value chart and a highlighter.  (Kids always get excited when the highlighters come out!)  Students used a pencil and the chart to write the number to round. 
  I announced: "Round to the nearest thousands!".  Students repeated: "Thousands, thousands, thousands, slap, TRAP!"  When they say slap, they use their left pointer finger to cover the digit in the given place.
 
 When they say trap, they color the digit in the next place to the right with the highlighter.  If the digit they "trapped" is 5 or more, the digit they "slapped" will go up by one.  If not, it will stay the same. 
 
All the digits to the right of the slapped/rounded digit turn into zeroes.  Any digits to the left of the slapped/rounded digit stay the same.  After the number line method, this seemed like a shortcut to many students.
     After instruction, some students gravitated to one method; some to the other.  In the end, all students benefitted from learning both methods.

Saturday, September 28, 2013

Paragraphing...BACKWARDS: A Five Day Lesson Plan

     I am very proud of my students and the volume of writing they are now able to produce in a single setting. Most of them can routinely write more than one full page.  But with this dramatic increase in volume often comes a lack of punctuation.  In addition as the length of students' stories increases, the skill of paragraphing becomes even more important.
     Most resources about paragraphing are instruction before students begin writing.  There are all sorts of graphic organizers and hamburger diagrams.  I decided to tackle paragraphing after students have written.  By teaching about paragraphing after writing, I can also tackle issues like elaboration and end punctuation, which are still important skills that students lack.
     For the first paragraphing lesson, I copied some pages from the book we are currently reading.  I tell the students the main reasons for paragraphing:  changes in speaker, time, and place.  I used Whole Brain Teaching techniques with pair teaching and gestures to help students remember the reasons for paragraphing.  Using the text selection and highlighters (kids love those), I had my students highlight the three reasons for paragraphing in three different colors.  They did this in pairs. 
     The next day, I gave students a piece of writing I wrote without paragraphs.  Again in pairs, students discussed where the paragraphs should be.  As a class we shared our ideas, making sure to justify our conclusions. 
     On Day #3 it was time for students to begin revising their own writing.  I used Lucy Calkins "box" technique.  In this technique, students draw a box with colored markers around their paragraphs.  Students worked with pairs.  Once students make boxes around their paragraphs, I asked them to count the number of sentences in each box.  For their assignment during Writing Workshop, students need to add some detail sentences to any paragraph that has less than four sentences.  Since students write on every other line in their daybooks, it is relatively easy to add detail sentences.  I collected the daybooks and sorted students by those who were struggling with paragraphing and elaboration and those that were not. 
     The following day, I met with the students who were struggling the most for extra assistance.
     On the final day of the week, I had students choose a section of text and rewrite it for evaluation.  They had to take at least two consecutive paragraphs and rewrite them.  I went over the assessment rubric prior to the assessment.  Students had to be able to show at least two paragraphs of a minimum of four sentences each, correctly punctuated. 

Sunday, September 22, 2013

Adventures in Literacy

We are nearing the end of the first month of school.  I have to rank this class as one of the most challenging of my career.  We are moving forward, but at a slower pace than I am accustomed to. 
     During Daily Five we are still working on building stamina.  Many students still just get up to get more books in the middle of it or talk to each other.  Most of that talking is innocent and impulsive, but the fact that they are still doing it shows that they are still working on stamina.  Normally I would be starting reading groups next week.  I still will, but many students will also begin the week with assigned seats that put them where I can see them and more than a single arms length from others (which is what we typically do).  This is the first step I take with students who are not building stamina.  After a week, they can have their choice back.  Make poor choices again and there are no more choices of where to sit.  This is how the CAFE Menu looked half way through individual reading inventories.  The "thumbs up" on the black paper represent the goals of each student.
      After a rough start (again-building stamina), Writing is going well.  I have seen some real improvement already using Lucy Calkins Units of Study.  Her techniques are simple enough that they are easy for students to implement.  They are very concrete as well.  This is how our Writer's Block looks as we are transitioning to from stamina lessons to craft lesssons-
There are lots of resources for students who need ideas to write about, including laminated pages from a costume catalog.
I also saw these descriptors for the four levels I used for Writing.  I thought I would add them to the display: Keep "TRI"- ing, Coming A-"ROUND", "SQUARE" Deal, and Love It!
     In the front of the room I added the class rules (below the board) and a cursive alphabet (above the board.

Saturday, September 7, 2013

Week 2 Update: I Love Math

     Those of you that know me well know my passion for differentiated groupings that I call "I Love Math" groups.  I Love Math is a structure  that divides the class into a high, average, and low group and cycles those groups through three different stations.  Once the students get the rotations (which are always in the same order no matter what group the child starts with), things run like clockwork.  In the past I have always had an aide, Title One teacher, or special education teacher in my room to help ensure things go smoothly.  That way two of the groups have adult supervision.
     This year, for the first time, our grade has been required to level for Math.  Since I was in the fifth grade at the time, I could not attend the meetings where they assigned teachers to the different levels.  I have one of the average groups.  Two of our classes (mine and the high group) do not have a support person in the classroom for Math.  The other six specialist are divided among the bottom three classes.  This is my first year trying I Love Math groups by myself.  I knew it would be a real test of the structure that I love so much.  If I can do it alone, then there is hope for other teachers who are solo practitioners.  And yes, even a leveled Math group has enough differences in it to warrant differentiated instruction.
     First of I decided that I needed to have I Love Math groups a lot more often.  In the past I have done them regularly (once or twice a week), but only as needed. I know that the more I do them, the better the students get at it.  I decided that this year I would have a whole class lesson on Monday which would end with an ungraded pre-test.  This would be used to create differentiated groups Tuesday through Thursday.  Friday will be another whole class lesson and post-test.
     I also knew that I needed to use technology to help me keep track of the progress of my students in the same way that another person used to  do.  Luckily I found Ten Marks, a free site where I can assign specific skill lessons for my students. 
     After one week of following this plan the results have been fairly good.  Technology has been the biggest challenge.  Our wireless internet is not always reliable and the students are not used to logging in to the computers and finding websites in a timely manner.  I hope that time and experience will help the students complete this part of the task more quickly and easily.  If not, I may have to alter the activities or the order.  I wish I had enough computers for all of the students to start on them and then move to other activities, but the most I can get are 8.
     Great ideas are worth the time it takes to make them successful.  I'm up for the challenge!

Saturday, August 31, 2013

First Week of School Over!

     I just finished my first week (three days) of school.  I can tell this year will be one of professional growth already. 
     I noticed a big difference in the students as I moved down to fourth grade from fifth grade.  The students organizational abilities need a lot of development. They don't clean off their desktops at the end of each academic period.  They don't push in their chairs when they leave their seat.  They have never used Agendas before and they write very slowly. 
     I have a special education aide in my room most of the day whom I have never worked with before.  This means I have one more person that I have to introduce to my classroom routines.  I also have a high percentage of special needs students in my room, including one student with a behavior disorder.  This student started having difficulties the first day of school.  By day 2 I had to have him take an extended time-out in our behavior room.  I am already networking with our resource people for behavior.  Day #3 was better, but I had to stay glued to his side.  I know other students are suffering because they can't work independently for more than five minutes yet and don't know classroom routines.  I will definitely learn some patience this year!
     When I reflect on this first week, I am also thinking about the tremendous growth I experienced as a looping teacher for the past two years.  Although I do not know whether my new principal will allow looping next year, I do know that these students will improve by leaps and bounds this year.  Whether I get to stay with them for one year or two, I know they will make progress like my students do every year.

Saturday, August 24, 2013

Displays 2013-2014: Everything Else

Whew,  I'm finally done setting up my classroom.  It always seems like I need more time than I get.  In the middle of this set-up week, a team-mate had her baby early (so we had to visit her, of course and help her long-term sub adjust) and our new Spelling/Vocabulary series arrived (time out to stamp it and deliver it to all the team).  But, all-in-all, I'm ready enough.

This bulletin board idea came from Teachers Pay Teachers.  Right now the pictures are just "place holders".  I'm going to have the kids design their own iPads with a "playlist" of books they have read or want to read.

 "How Much Signal Strength is Your Brain Using Today?" is from literacy specialist Jenn Jones of Hello Literacy. It's a kid-friendly version of Bloom's taxonomy.   This is on our big "team" bulletin board across from the bathrooms/Library.
 These balloons are from Really Good Stuff.  My students decorated them on Step Up Day in the spring.  I think it will be great for them to see something they created on the first day of school.
 These are a couple views of my classroom library.  As a mother of four and the daughter and daughter-in-law of teachers, I am lucky to have an extensive classroom library of about 3,000 titles.  I am also lucky to have a crafty husband to build all these shelves. 


Tuesday, August 20, 2013

Displays 2013-2014: Reading

I'm nearly done with the displays for my classroom.  Today I laminated a lot of instructional materials.  Hopefully the printers will be hooked up to the wireless internet by tomorrow so I can print all the stuff I bought at the TpT Back to School sale.
I have some new displays for Reading and some old favorites.  Of course, I had to start with the CAFE Menu with new polka dot border and matching header.  I love the magnetic paw prints that hold the border in place.
Opposite the CAFE Menu is my primary teaching area.  I have the easel to work with the whole class on the carpet.  I can easily transition to small groups with the table right next to me.
Last year I moved away from a Math CAFE Menu and found that I really missed it.  So this year it is back.  The hardest part was dealing with the big bulletin board in the middle of the wall.  I'm still not 100% sure that I like the way it is now with fact fluency being the center of attention.  I'll have to see how it works as the year goes on.
 
This new bulletin board will support my new school year resolution to emphasize vocabulary instruction more.  Right now it's just blank with the heading "Word Nerds".  Next to the bulletin board is a list of the CCSS vocabulary standards.
The Theme Board is not new to my classroom.  The idea comes from master teacher Beth Newingham.  I use the stories that we read as a class that are part of my basal series.  After we finish a story, we debate and then vote on the theme. We put a picture of the cover of the story under the theme we decide.   The first few times it is very challenging for students to do this.  As the year progresses they get better and better.
 
This year I added "Got Character?".  The plan is to start by labeling the emotions with different synonyms to expand the students vocabulary for describing characteristics.  Then I'm going to do something very similar to the Theme Board where we will post the name of the character beside the characteristic. 
The last change was the Super Improvers Wall (see www.wholebrainteaching.com).  Previously the colored card system for misbehavior and the reward system of drawing stars in index cards were in two separate locations.  To make room for other interactive displays, I needed to combine the two systems.  For more information on each system, please download Chris Biffle's free ebook or watch his inspiring videos.  
 
One last tip/trick:  I don't know about you, but I just can't seem to get stickers to stick on my cubbies.  They have so much sticker residue built up over the years it's just not working.  My cheap trick is to cover the sticker with clear packing tape.
 
I turn down one top corner to make the tape easier to remove at the end of the year.  Voila!


Tuesday, August 13, 2013

Displays for 2013-2014: Part 1 Writing

This week we had two days of teacher workshops, so I was able to get back into my room and do a little setting up.  I have been focusing on setting up for Writing instruction.  Here are the latest pics:
My "Writer's Block" starts out very simply.  I have the six traits and the title "Writer's Block".  Over the first weeks of instruction the traits will be moved to the side of the bulletin board as the actual board is filled with posters that we co-create as part of the lessons.
This is the example of one smaller poster.  The words on the poster match the assessment rubric exactly, so that students can get used to the language of the rubric.  On the first day students decorate the cover of their notebook on the inside front cover write their three goals for the year.

Above the Writer's Block is a graphic with the levels of proficiency I use in my classroom:  substantially below proficient, partially proficient, proficient, and distinctive.  These are the same designations used by my state.

These are my completed editor name badges (see this post) with my shape-coded levels.  There are a couple of students without shapes because they are new to our district.  I will do a writing benchmark on them in the first week to get their current level of functioning and complete their name badge.
This is an expanded view to show how the name badges double as an attendance board.

Sunday, July 28, 2013

Whole Brain Teaching: Oral Writing FREEBIE

     This summer I have been re-watching the classroom management videos that are available on Whole Brain Teaching.  If you have never heard of WBT, you have got to try Chris Biffle's methods!  Everything whole brain teaching is totally revolutionary and free!  He started out with great classroom managment tools.  Recently he has added more academic content.  I want to start some of his methods on day one. 
     One of my favorites is Oral Writing.  Chris maintains that students cannot improve in writing without first having good oral communication.  This is especially important for English Language Learners, students of poverty, and students with poor receptive and expressive language skills.  I assessed my class on the skill of oral writing on Step-Up Day when students had to use 7-Up sentences (sentences with a minimum of 7 words) to describe themselves and their hobbies (see my blogpost).  I found that many students had difficulties doing this.
     When I reviewed the video on Oral Writing, I noticed how Chris taught specific "adders" to help students extend their sentence length and improve their critical thinking.  I felt that I wanted to post these "adders" at the beginning of the year, so I made these adder strips.
          Each adder has a picture and a gesture.  That way, if a child gets stuck, their peers can non-verbally suggest an adder by doing its gesture.
In the spirit of Chris Biffle, this is a FREEBIE.  Just click the picture to get your own adders!

Wednesday, July 24, 2013

Multiple Uses of Name Badge Holders

This summer one of my professional reading books was Word Nerds by Overturf, Montgomery, and Holmes-Smith.  In the book they suggested the use of inexpensive badge holders to assign each student a vocabulary word to practice activities throughout the day.  As I purchased the badge holders, I got to thinking how I could make this tool work in other areas.  Here's my plans for next year:

1.  Attendance and Lunch Count
     I glued a magnet to the back of the holder.  Students will move their badge from the absent section to their lunch choice each day as an easy way to take attendance and take lunch count.

2.  Peer Editing Based on Writing Goals and Levels of Proficiency
     Writing is right after recess in my classroom.  When they come in, they will take their badge holder off the attendance board and clip it on with their name showing.  Below their name, each child has the Six Traits of writing.  Their personal goals are boxed in red. Nick's goals are in Ideas, Organization, and Sentence Fluency. Their present level of proficiency is represented by a shape:  triangle for level 1, circle for level 2, square for level 3, and heart for level 4.  Seeing these shapes will give students daily reminders of their goal areas.  If students move up a proficiency level during the year, I will change the foam sticker. 
     In my classroom, students can only be a peer editor in an area where they are at a higher profiency level than the peer they are editing with. So, for example, Nick has a level 2 in Sentence Fluency.  He can be a peer editor for a student with level 1 in Sentence Fluency. The badge will let all students know where they stand visually.
     But, you might say, Nick has a goal to improve in that area.  All the better.  As Nick helps other students, he will become stronger and practice that skill.  As teachers, we all know how much we learn when we have to teach others.
       Below is the start of a poster that explains the four levels.  This will go on my "Writer's Block" bulletin board and goes with my classroom colors of chalkboard green, black, and ladybug red.

3.  Vocabulary Practice
     Right after Writing is ELA, which consists of English grammar, spelling, and vocabulary.  Students will turn their names around to become vocabulary words for this instruction.  In the picture you can see the magnets I attached to the back for attendance.  I think I will make a nice and quick, but meaningful, transition from Writing to ELA, which occurs back-to-back in the same literacy block.
     Students will use the vocabulary words in many hands-on and creative ways.  They can line up by definition, in alphabetical order, group themselves by parts of speech, roots, or affixes.  Throughout the week, students will be adding synonyms and antonyms to the 5 core words for the week.  Students can pair with their synonym or antonym and decide which is "stronger" and why.  They can us the vocabulary cards for charades and creating oral sentences, which the authors of Word Nerds call 7-Up sentences because they need to have seven words or more. Students can create or find on the Web images to illustrate their word.  For an even greater challenge, students can find a single color that represents the word.

Saturday, July 20, 2013

Assessment Data Binder

This week I have been very busy creating products for teachers.  I have to confess that the hot and humid weather here in the Northeast has been behind it.  The only comfortable spot is in front of the computers with two fans running!  And the last place I want to go is the beach or lake because they are so crowded.
My latest product is a Youtube video titled: Assessment Data Binder.


Many people have asked about how I set up my binder.  It certainly is a "hot topic" (no pun intended!). I am very lucky that us fourth grade teachers get a portfolio that includes both numeric assessment data, and samples of student work.  I pour over these portfolios in early July to set up my Assessment Data Binder.  Having plenty of time to look at the portfolios helps me "hit the ground running" when the school year begins. I definitely make tweaks once I get to know each child individually, but surprisingly I don't need to do that very often.  The video has links to my former blogposts where I offer some of the forms for free.  If you are interested in the assessment web, please leave a comment below.  The writing rubric is part of one of my paid products on Teachers Pay Teachers.
What do you do to keep track of assessments?